
448 products
448 products
Sort by:

$2.99
Unit price per$2.99
Unit price perReplacement antenna for diversity receiver / telemetry system
- Careful workmanship and inspection to ensure this IPX-3 connector with antenna performs exceptionally well in transceiving 2.45GHz signal
- 20 cm in length

DSMP 6-channel receiver is DSMX/DSM2 compatible that provides exceptional performance.
Specifications:
- Dimensions: 42x23mm
- Weight: 2.3g
- Voltage Range: 3.5V to 8.5V (2S LiPo compatible)
- Technology: DSMP with GEN2 SDR stack (DSMX / DSM2 Compatibility)
1S LiPo Application
The minimum recommended safe supply voltage is 3.5V
NOTE:
-
The battery must be capable of maintaining that voltage while delivering the required maximum load current to the receiver and servos. In some cases you MAY be able to operate at a lower voltage (for example a well discharged 1S LiPo cell) but you must test it in practice to be sure.
Lemon RX products are tested to be compatible with Spektrum's DSMX and or DSM2 product (Spektrum, DSMX and DSM2 are the registered trademark of Horizon Hobby, Inc.).

The generation 2 DSMP 7-channel telemetry stabilizer is a complete redesign that provides the ultimate reliability, features and performance.
- DSMX / DSM2 compatible, 7-channel full-range telemetry stabilizer with full telemetry features including a built-in barometer, altimeter, energy meter (Current, Voltage, mAh), and internal temperature sensor
- High sensitivity gyro with proprietary stabilization algorithm ensures responsive airplane control for both electric and gasoline engine application
- BEC1 and BEC2 dual inputs allow high-reliability operation while improving setup for high current drain performance servo
- Built-in Delta, V-tail and Normal Wing mixer
- Supports stabilization with separated channel dual aileron operation
- Stabilization always-on feature
- Real-time variable stabilization gain control on channel 8
- All-channel failsafe
- Firmware health monitoring software stack and ultra-low operational voltage (3.6V) ensure the highest hardware reliability
- Generation 2 SDR stack ensures the fastest channel searching and advanced algorithm for signal recovery with ultra-low-latency experience
- Antenna diversity improves the reliability of the wireless link
- Satellite port for additional signal diversity
- Gyro stabilization activation with either AUX2 or Gear channel
- 3 potentiometers for individual gain tuning
User manual (See http://www.lemon-rx.com/manual Quick Reference Guide)
- Reset stabilizer
- Connect power
- Hold F and B buttons (approximately 5 secs+) until all LED flashes randomly
- Press the C button. Multiple LEDs flash a few times to complete the operation
- Bind with bind plug
- Insert bind plug on Channel 7
- Connect power
- Bind without bind plug
- Connect power
- Hold the B button until the red LED flashes
- Bind with a satellite without a bind plug
- Connect power
- Hold the B button until the red LED flashes
- Disconnect power
- Plug the satellite wire connector into the stabilizer
- Connect power
- Failsafe
- Connect power to the receiver and ensure the servos are working with the transmitter
- Press the F button for 3 seconds until green changes from off to on and vice versa to change the failsafe setting. Channel value is saved as failsafe default at the time the green LED turns on.
- Turn off the transmitter and wait 2 seconds to ensure the failsafe is activated accordingly by ensuring there is torque generated with finger-pushing the servo linkage if it was to be set. Vice versa.
- Stabilization activation switch
- Disconnect power
- Insert bind plug to channel 5
- Hold the C button
- Connect power. Wait for about 1 second until the 6 LEDs flash.
- Release the C button
- Press C to make changes within 3 seconds. Green = CH7, Blue = CH5.
- Wait for 3 seconds and remove the bind plug
- Wing Mode and Dual Aileron
- Disconnect power
- Insert bind plug to channel 6
- Hold the C button
- Connect power. Wait for about 1 second until the 6 LEDs flash
- Check the receiver label/user manual to understand the referred LEDs' operation
- Release the C button
- Observe which red LED is flashing and brief press C to select the required mode
- Press C to toggle between settings. On means selected. Exit automatically in 5 seconds.
- Wait for 3 seconds and remove the bind plug
- Ensure transmitter mixing is set accordingly for dual aileron if stabilized dual aileron is to be configured.
- Gyro direction
- Check the receiver label/user manualto understand the referred LEDs' operation
- Connect power and wait 1 second
- Hold the C button and wait for about 1 second until the 6 LEDs flash
- Release the C button
- Observe which red LED is flashing and brief press C to select the required mode
- Press C to toggle between settings. On means selected. Exit automatically in 5 seconds.
- Wait for 3 seconds and remove the bind plug.
- V/I sensor calibration
- Turn on the receiver and transmitter. The telemetry report page may optionally be checked during and after calibration.
- Plug the V/I sensor. Make sure the required DC loading device such as a brushless motor with ESC as well as the current and voltage meter is connected.
- Press the F and B buttons together at the same time for 2 seconds but no greater than 5 seconds
- Observe 3 green LED flashes. Ensure 8.4V is provided to the V/I sensor.
- Press F or C button briefly
- Observe 3 red LED flashes
- Turn on the DC loading device by throttling the transmitter. Ensure 4A is drawing across the V/I sensor. Be careful with the motor spinning if it is to be used.
- Press the B button to save and exit.
- V/I probe calibration
- Turn on the receiver and transmitter. The telemetry report page may optionally be checked during and after calibration.
- Plug the V/I sensor. Make sure the required DC loading device such as a brushless motor with ESC as well as the current and voltage meter is connected.
- Press the F and B buttons together at the same time for 2 seconds but no greater than 5 seconds
- Observe 3 green LED flashes. Ensure 8.4V is provided to the V/I sensor.
- Press F or C button briefly
- Observe 3 red LED flashes
- Press the B button to save and exit.
- Gain setting
- Adjust via the 3 dials or real-time master gain on channel 8 depending on the transmitter channel's availability.
- View setting LEDs with all on
- Press the C button briefly (no more than 2 seconds).
Lemon Rx products are tested to be compatible with Spektrum's DSMX and or DSM2 product (Spektrum, DSMX and DSM2 are the registered trademark of Horizon Hobby, Inc.).

- High sensitivity gyro with proprietary stabilization algorithm ensures responsive airplane control for both electric and gasoline engine application

- High sensitivity gyro with proprietary stabilization algorithm ensures responsive airplane control for both electric and gasoline engine application

- High sensitivity gyro with proprietary stabilization algorithm ensures responsive airplane control for both electric and gasoline engine application

When your aircraft needs more than a basic receiver, bolting in a separate stabilizer, telemetry sensor and voltage monitor can turn a clean install into a tiny wiring swamp. The Lemon RX LM0087XT60X keeps the important bits in one compact DSMP 10-channel telemetry stabilizer receiver with an XT60 energy meter, built for DSMX/DSM2 compatible RC aircraft setups.
It gives you full-range control, gyro stabilization, telemetry, and flight-pack energy monitoring in a 16.3g unit measuring 66x15x24mm. The built-in barometer supports altitude and varios telemetry, while the XT60 V/I sensor setup reports flight-pack voltage and current up to 5S LiPo / 21V max and 60A max. Useful information, less guesswork, fewer post-flight battery autopsies.
The LM0087XT60X also supports normal, delta and V-tail mixing, separated dual aileron stabilization, all-channel failsafe, dual BEC inputs, antenna diversity, an optional satellite port, channel 8 real-time gain control, and three onboard gain pots. Receiver power range is 3.9V to 8.5V, so it fits common BEC and receiver battery setups without needing a doctorate in small wires.
Lemon Rx products are tested to be compatible with Spektrum's DSMX and or DSM2 product (Spektrum, DSMX and DSM2 are the registered trademark of Horizon Hobby, Inc.).
Quick Reference Guide
Reset stabilizer
- Connect power
- Hold F and B buttons (approximately 5 secs+) until all LED flashes randomly
- Press the C button. Multiple LEDs flash a few times to complete the operation
Bind with bind plug
- Insert bind plug on Channel 10
- Connect power
Bind without bind plug
- Connect power
- Hold the B button until the red LED flashes
Bind with a satellite without a bind plug
- Connect power
- Hold the B button until the red LED flashes
- Disconnect power
- Plug the satellite wire connector into the stabilizer
- Connect power
Failsafe
- Connect power to the receiver and ensure the servos are working with the transmitter
- Press the F button for 3 seconds until green changes from off to on and vice versa to change the failsafe setting. Channel value is saved as failsafe default at the time the green LED turns on.
- Turn off the transmitter and wait 2 seconds to ensure the failsafe is activated accordingly by ensuring there is torque generated with finger-pushing the servo linkage if it was to be set. Vice versa.
Stabilization activation switch
- Disconnect power
- Insert bind plug to channel 8
- Hold the C button
- Connect power. Wait for about 1 second until the 6 LEDs flash.
- Release the C button
- Press C to make changes within 3 seconds. Green = CH7, Blue = CH5.
- Wait for 3 seconds and remove the bind plug
Wing Mode and Dual Aileron
- Disconnect power
- Insert bind plug to channel 9
- Hold the C button
- Connect power. Wait for about 1 second until the 6 LEDs flash
- Check the receiver label/user manual to understand the referred LEDs' operation
- Release the C button
- Observe which red LED is flashing and brief press C to select the required mode
- Press C to toggle between settings. On means selected. Exit automatically in 5 seconds.
- Wait for 3 seconds and remove the bind plug
- Ensure transmitter mixing is set accordingly for dual aileron if stabilized dual aileron is to be configured.
Gyro direction
- Check the receiver label/user manual to understand the referred LEDs' operation
- Connect power and wait 1 second
- Hold the C button and wait for about 1 second until the 6 LEDs flash
- Release the C button
- Observe which red LED is flashing and brief press C to select the required mode
- Press C to toggle between settings. On means selected. Exit automatically in 5 seconds.
- Wait for 3 seconds and remove the bind plug.
V/I sensor calibration
- Turn on the receiver and transmitter. The telemetry report page may optionally be checked during and after calibration.
- Plug the V/I sensor. Make sure the required DC loading device such as a brushless motor with ESC as well as the current and voltage meter is connected.
- Press the F and B buttons together at the same time for 2 seconds but no greater than 5 seconds
- Observe 3 green LED flashes. Ensure 8.4V is provided to the V/I sensor.
- Press F or C button briefly
- Observe 3 red LED flashes
- Turn on the DC loading device by throttling the transmitter. Ensure 4A is drawing across the V/I sensor. Be careful with the motor spinning if it is to be used.
- Press the B button to save and exit.
V/I probe calibration
- Turn on the receiver and transmitter. The telemetry report page may optionally be checked during and after calibration.
- Plug the V/I sensor. Make sure the required DC loading device such as a brushless motor with ESC as well as the current and voltage meter is connected.
- Press the F and B buttons together at the same time for 2 seconds but no greater than 5 seconds
- Observe 3 green LED flashes. Ensure 8.4V is provided to the V/I sensor.
- Press F or C button briefly
- Observe 3 red LED flashes
- Press the B button to save and exit.
Gain setting
- Adjust via the 3 dials or real-time master gain on channel 8 depending on the transmitter channel's availability.
View setting LEDs with all on
- Press the C button briefly (no more than 2 seconds).
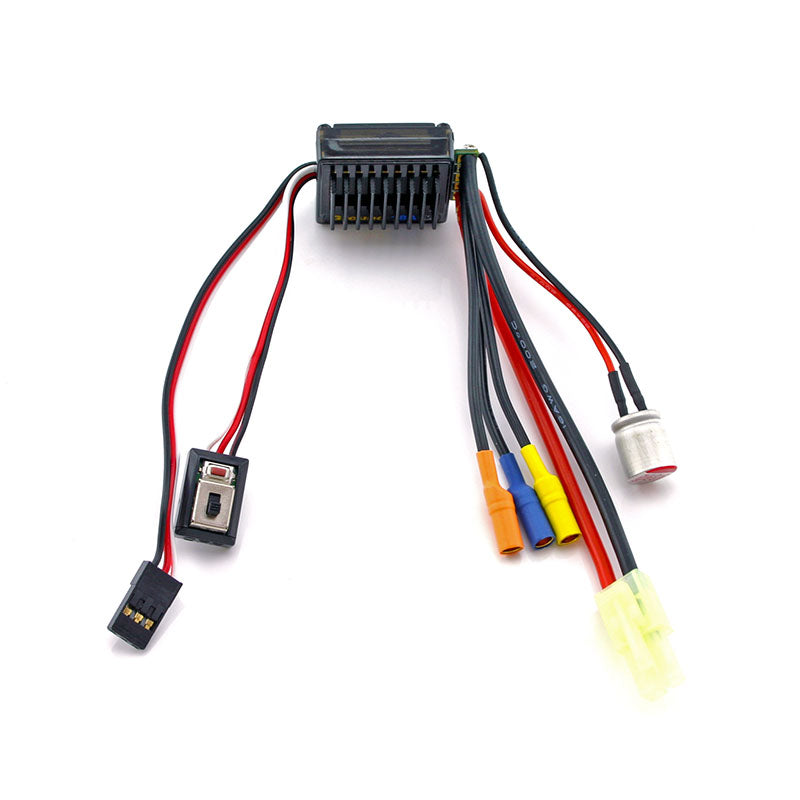
This is the Leopard Version 2.0 18A Sensorless Brushless ESC. A great speed control for your 1/18 scale mini or micro RC, comes equipped with a mini-Tamiya style plug for battery conenction and 3.5mm bullet terminals for motor connection.
Features:
- Compatible with sensorless brushless motors.
- High quality components
- Excellent start-up, acceleration and linearity features.
- Plenty of programmable items
- Multiple protection features: Low voltage cut-off protection / Over-heat protection / Throttle signal loss protection.
- Internal timing can be changed easily
- Easily programmed with the SET button or LED Program Box
Specifications:
- Output: Continuous 18A, burst 50A.
- Input: 4-9 cells NiMH/NiCd or 2-3S LiPo.
- BEC: 6V/1A (Linear mode built-in BEC).
- Resistance: 0.01 Ohm.
- Motor Supported: Sensorless Brushless Motor.
- Suitable Motor: With 4-6 cells NiMH/NiCd or 2S Lipo: On-Road≥12T, Off-Road≥8T; With 6-9 cells NiMH/NiCd or 3S Lipo: On-Road≥18T, Off-Road≥24T;
- Suitable Car: 1/18 on-road sport.
- Cooling Fan: Not included.
- Size: 31.5mm(L) * 27.5mm(W) * 15mm(H).
- Weight: 19g (Without wires)
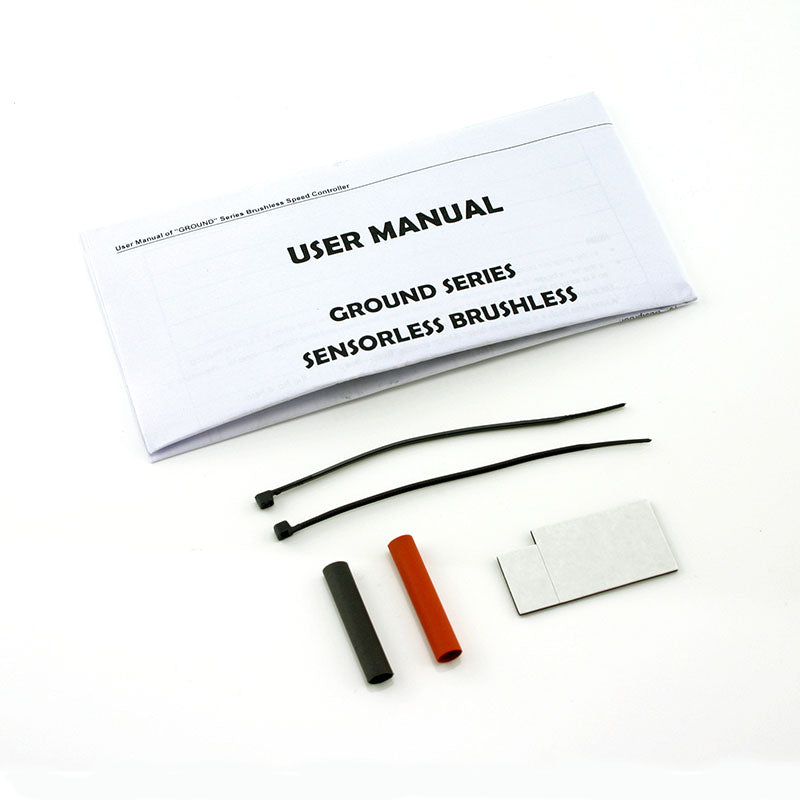
Includes:
- (1) 18A ESC
- (2) Zip-ties
- (2) Shrink-tubing
- (1) Double-sided tape
- (1) Instruction manual


The Leopard 4092 is a crazy long, crazy powerful motor. Can be used in anything from 1/8 vehicles, lightweight 1/5 scale rigs and large boats. Check your clearance before ordering!
Leopard motors are built using the highest grade components for outstanding performance and long life. The latest generation 4-pole rotors provide massive torque, and are Kevlar wrapped to ensure the magnets stay put at all RPM’s. All components are precision machined, balanced and hand-built to guarantee quality, and with an extensive product line including many sizes you just won’t find from other manufacturers you are sure to find a Leopard motor to fit your application.
Features:
- Precision machined aluminum housing
- Kevlar wrapped, 4-pole rotor
- Imported high-speed Japanese bearings
- Hand wound stator, using high-purity/high-temperature copper wire
- Excellent heat dissipation


The Leopard 4274 is an all new motor from Leopard for 1/8 monster trucks and truggies. This torque monster features sensored operation for smooth, reliable power delivery.
Leopard motors are built using the highest grade components for outstanding performance and long life. The latest generation 4-pole rotors provide massive torque, and are Kevlar wrapped to ensure the magnets stay put at all RPM’s. All components are precision machined, balanced and hand-built to guarantee quality, and with an extensive product line including many sizes you just won’t find from other manufacturers you are sure to find a Leopard motor to fit your application.
Features:
- Precision machined aluminum housing
- Kevlar wrapped, 4-pole rotor
- Imported high-speed Japanese bearings
- Hand wound stator, using high-purity/high-temperature copper wire
- Excellent heat dissipation


The Leopard 5892 is a behemoth powerhouse for 1/5 and 1/4 vehicles and 1000mm-1800mm length boats. This one is a BEAST!!
Leopard motors are built using the highest grade components for outstanding performance and long life. The latest generation 4-pole rotors provide massive torque, and are Kevlar wrapped to ensure the magnets stay put at all RPM’s. All components are precision machined, balanced and hand-built to guarantee quality, and with an extensive product line including many sizes you just won’t find from other manufacturers you are sure to find a Leopard motor to fit your application.
Features:
- Precision machined aluminum housing
- Kevlar wrapped, 4-pole rotor
- Imported high-speed Japanese bearings
- Hand wound stator, using high-purity/high-temperature copper wire
- Excellent heat dissipation


$14.99
Unit price per$14.99
Unit price perLeopard LED program card for use with Leopard ESC's. NOTE: Does NOT work with orange Leopard 60A ESC's, those require the orange Leopard program card.

$14.99
Unit price per$14.99
Unit price perCooling fan for Leopard BL5 or Hobbywing Max5 ESC. Measures 45x45x11.2mm, operates on 6V.

$12.99
Unit price per$12.99
Unit price perCooling fan for Leopard WP-BL-160A or Hobbywing Max6 ESC. Measures 35x35x10.4mm.


$6.99
Unit price per$6.99
Unit price perNever charge a Lipo battery without one of these! Designed to contain a fire should one break out while your battery is charging. These bags are made from a fire retardant woven fiberglass fabric and have a velcro enclosure to keep batteries inside. "Case" style is ideal for larger packs that do not fit well in conventional charging bags. We highly recommend you follow all Lipo safety guidelines and that you never leave a Lipo battery unattended while charging. For general Lipo safety as well as tech tips and charging information check out our section on Lipo Battery Basics.
Specifications:
- Size: 18.5cm x 7.5cm x 6cm
- Weight: 65g